Exploring different countries, be it for business or leisure, is always an exciting opportunity that few are willing to pass up. There is a magical charm in immersing oneself in the culture of a foreign country – seeing iconic landmarks, savoring local cuisine, and enjoying some shopping – that makes every peso saved for the trip well worth it.
One crucial part of going abroad is making sure you have the right visa to enter your chosen country legally. While some Asian countries welcome Filipino travelers without the need for a tourist visa, many others, especially the popular destinations in North America and Europe that Filipinos love, do require it.
In this blog, we will cover the essential details every Filipino should know when applying for a US tourist visa independently. By “independently”, we mean without the assistance of a trusted travel agency. There can be differences in the process when you go solo compared to having an agency facilitate your application. The visa requirements, application steps, and financial aspects can seem daunting to Filipinos. Many have heard stories of denials and worry about facing the same fate. While we cannot address the question of “Why was I denied my US tourist visa application?” here, our goal is to provide all the necessary information for a smooth and informed tourist visa application process.
Overview
Filipino travelers, like those from any country, can apply for various visas to enter the United States. If you are planning a short stay, a nonimmigrant visa is the way to go. This could be for business (Category B-1), pleasure (Category B-2), or a combination of both (B-1/B-2). On the other hand, if you are looking for a permanent residency, you will need an immigrant visa, which involves an entirely different application process.
Here are examples of B-1 visa applications for the following reasons/purposes:
- To consult with business associates
- To attend a convention or conference
- To settle an estate
- To negotiate a contract
Here are examples of B-2 visa applications for the following reasons/purposes:
- Tourism
- Vacation
- Visit friends and relatives who are permanent residents of the US
- To seek medical treatment
- To engage in social gatherings organized by fraternal, social, or service organizations.
- To take part in musicals, sports, or comparable events or contests, provided there is no salary involved for participation.
- To register for a brief recreational course of study that does not contribute credit toward a degree (such as cooking classes or art and writing classes).
How to Apply
You can now easily apply for your tourist visa online. Just use your desktop or laptop to fill out the application forms, and you can even save your progress. This way, you can pick up where you left off whenever you have some free time.
To apply online, follow these steps:
-
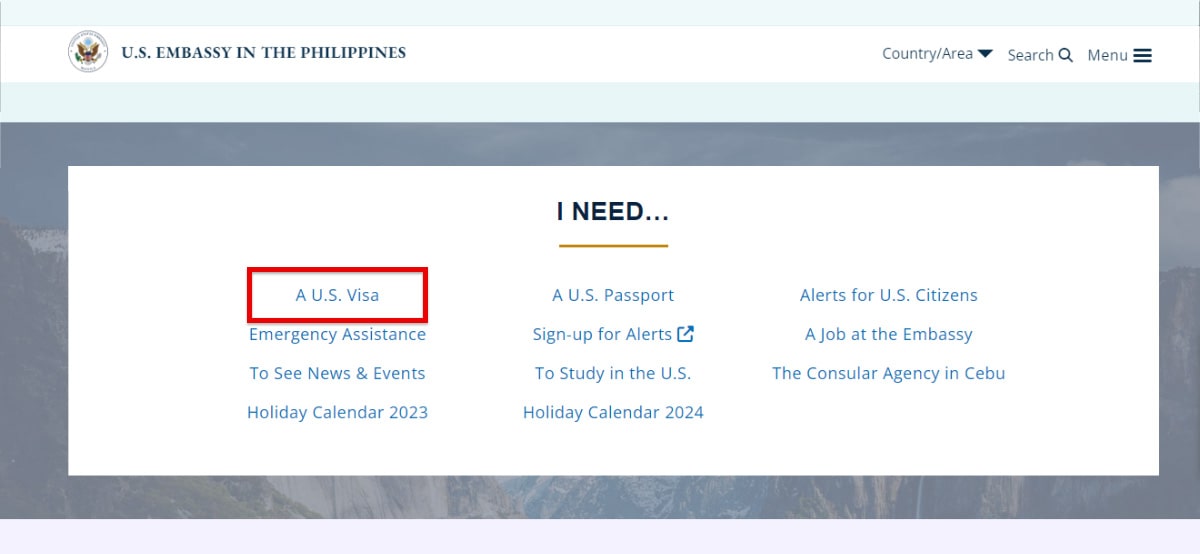
Log on to the website of the US Embassy at https://ph.usembassy.gov. Scroll down to the bottom of the page and click the A U.S. Visa link in the white box, as shown below. You will see all the important information you need to know about applying for a tourist visa.
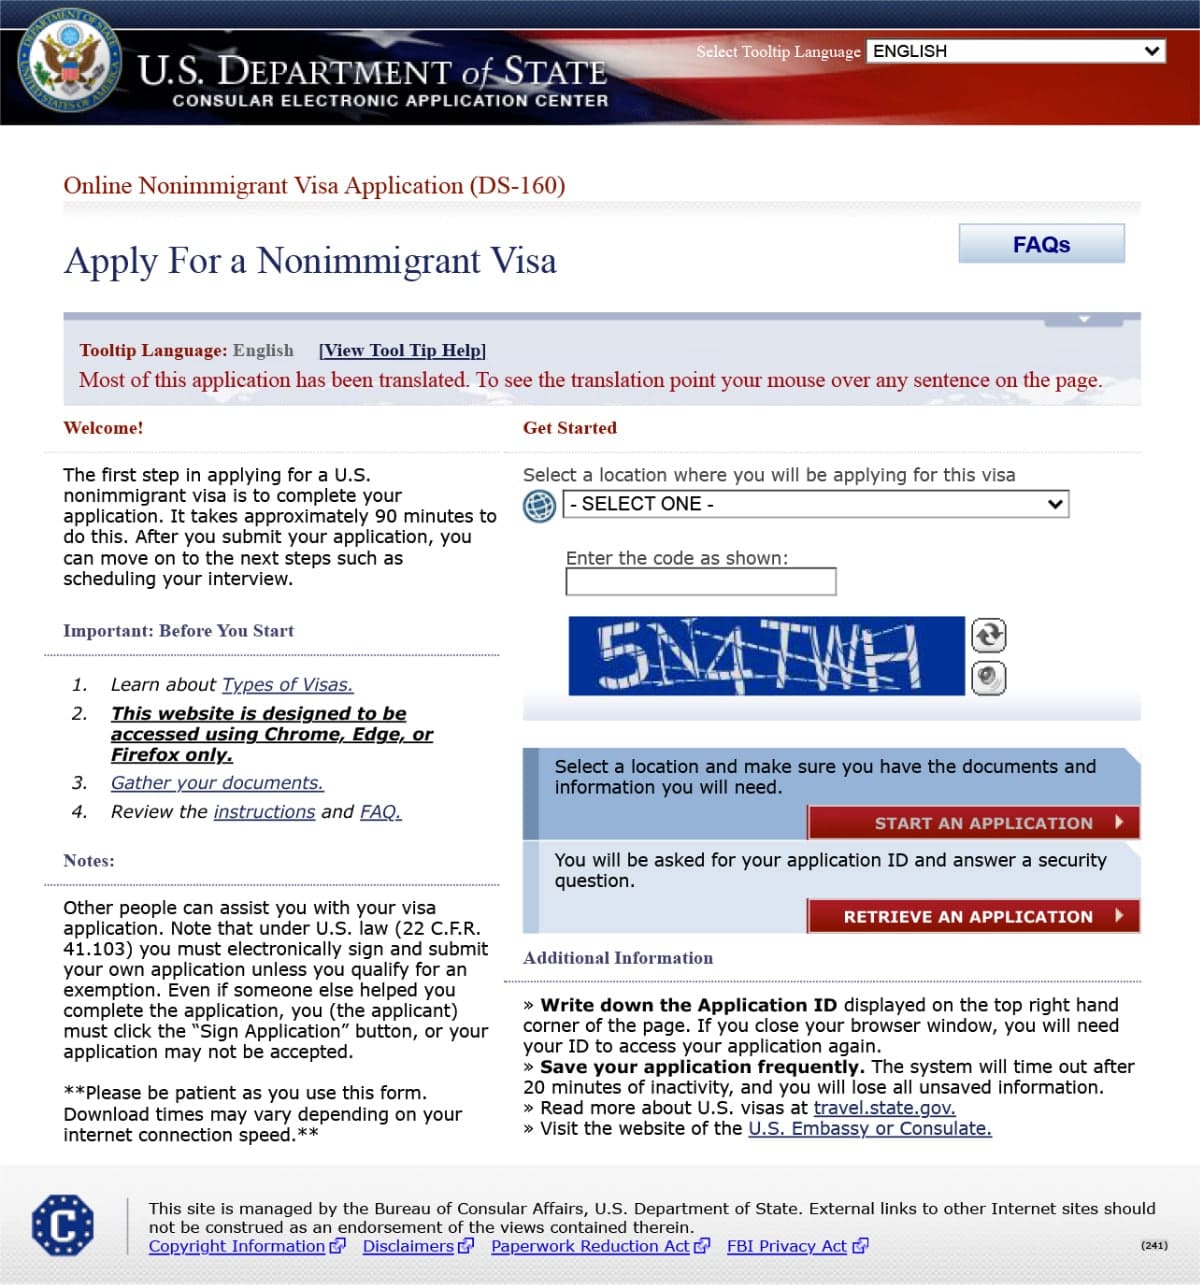
- To begin your online application, simply click on the following link: https://ceac.state.gov/genniv. This will take you to the Online Nonimmigrant Visa Application page (DS-160).
- Upon reaching this page, input your location (country) and accomplish the captcha test. When ready, click the Start an Application button. Make sure you have your passport and trip details to the US on hand.
-
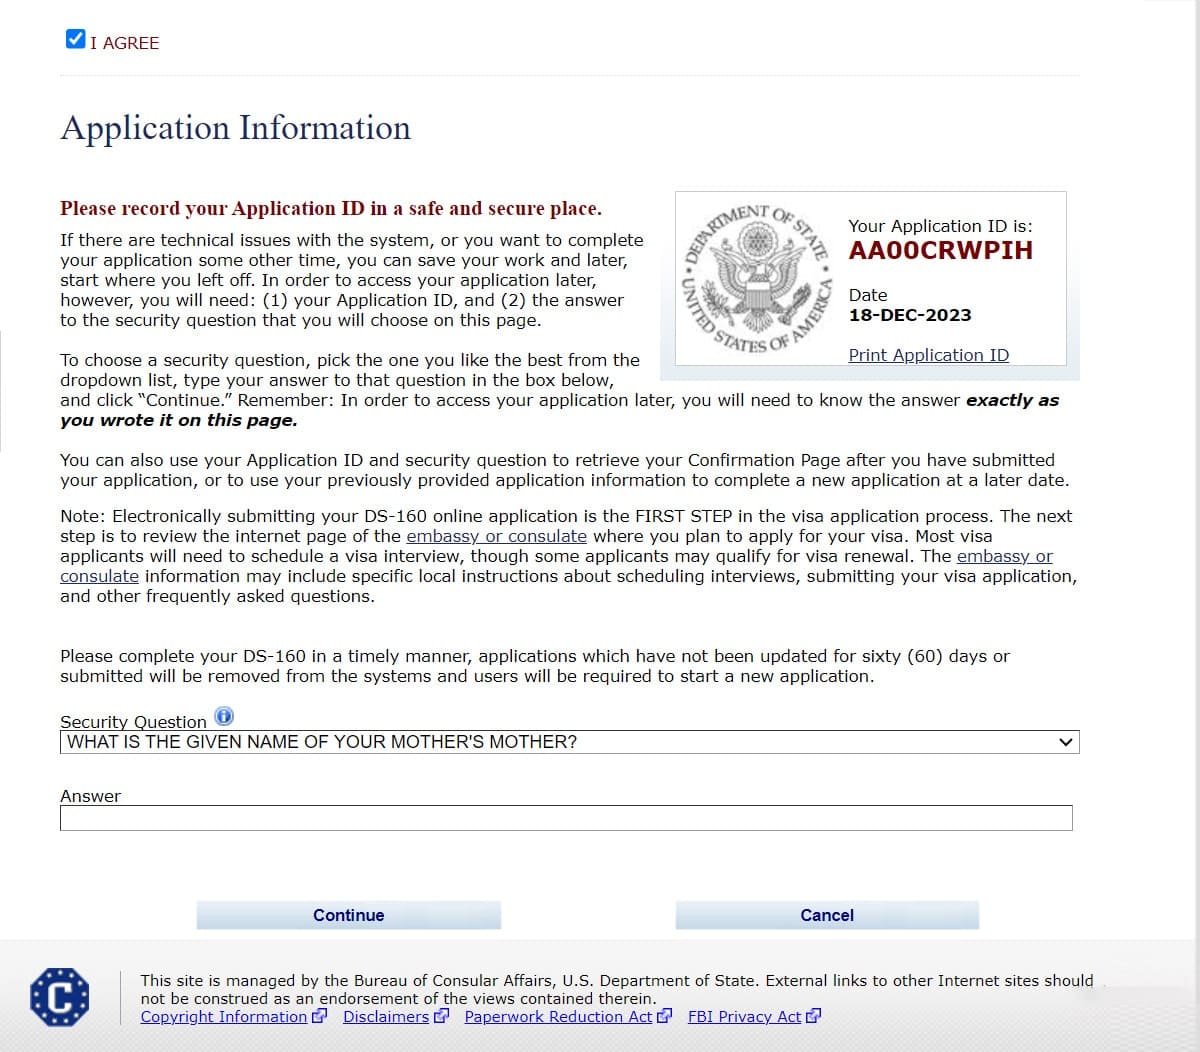
On the next page, an Application ID will appear on the upper right-hand corner of the screen. Remember to note this down because it is essential for logging in to continue and complete your application each time you revisit the site.
- Follow the instructions on each page, ensuring you do not skip any questions to prevent the rejection of your application.
- Only use the English alphabet when populating the application form. Avoid using characters like ñ, é, ü, or ç except when writing your full name that has any of these native alphabets.
- After completing the application form, you will be given time to review your answers for accuracy. Take a moment to carefully go over your answers to avoid any errors before finalizing your submission.
- Select the Sign Application button to electronically sign your application.
-
After thoroughly reviewing and correcting all entries in the application form, click the submit button. Wait for the confirmation page which will display a barcode.
It is best to check the website of the U.S. Embassy in the Philippines for the latest and most complete view of requirements and processes involved when applying for any type of U.S. visa. Make it a habit to visit their official website whenever you need information about visa appointments, payments, and processes.
Important reminders when filling out the DS-160 application:
- During the completion of the DS-160, there will be a prompt to upload your digital image. Ensure that you adhere to the instructions regarding the correct photo quality and size to ensure the system accepts your photo.
- Should you pause your work on this application for over 20 minutes, your session will expire. To resume, you need to start over unless you have saved your Application ID Number or stored your application as a file on your computer.
- If you have already submitted a DS-160 application, you can utilize the provided information to fill out a new application. Retrieve the Application ID from your prior submission to proceed. Click the Retrieve an Application button to access the details of your previous application and follow the provided instructions. When using this option for a new application, please ensure a thorough review to confirm that all information is current and accurate.
- If you do not intend to finish your application within the next 30 days, save the application form on your computer by clicking the Save button on the final completed page. Follow the provided instructions and when you are prepared to resume your application, choose the Upload an Application option.
What happens after the DS-160 form has been completed and submitted?
At this point, you have successfully completed the first step of the tourist application process. You are now ready to get a schedule for your visa interview appointment. Here’s what you need to do next:
- Print a copy of the DS-160 barcode page, excluding the entire application form.
- Schedule an appointment for your visa interview at the U.S. Embassy in Manila.
- Pay the visa application processing fee to secure your appointment. The application fee is non-refundable and as of this writing, processing fee is at USD 185.
-
Check the estimated appointment wait time to know how long (or how soon) you will be accommodated for the interview. As of this writing, the appointment wait time for the US Embassy in Manila are the following:
Nonimmigrant Visa Type Appointment Wait Time Interview Required Students/Exchange Visitors (F,M,J) 22 calendar days Interview Required Petition-Based Temporary Workers (H,L,O,P,Q) 25 calendar days Interview Required Crew and Transit (C,D,C1/D) 22 calendar days Interview Required Visitors (B1/B2) 39 calendar days -
Prepare the documents you need to present during the interview:
- Valid Philippine passport – the passport must be valid for at least six months beyond your period of stay in the United States.
- Form Ds-160 confirmation page print-out
- Application fee payment receipt
-
You may be required to present additional documentation during the interview including (but not limited to):
- the purpose of your trip
- your intent to depart the US after your trip (evidence of your employment or family ties to show your intent to return to your home country)
- your ability to pay for the cost of your trip or evidence that another person will cover (or sponsor) your trip.
-
Attend your visa application interview:
- Arrive on time.
- Wear appropriate clothing (avoid wearing clothes that are too casual)
- Bring all necessary documents with you.
After the interview, you will be informed if your visa application is approved or denied. If approved, your passport will be retained by the consular officer and later dispatched to you by mail and stamped with your visa.
Touring the United States is an exciting prospect for any Filipino traveler. While securing a US tourist visa may seem complex, the key lies in being well-prepared, composed, and transparent about your travel intentions. It is important to consider filling out the DS-160 form on your own, as you may be questioned by the interviewer based on the information provided. If someone else completes it for you, be sure to know the details they entered regarding you and your trip. This ensures that your responses in the form and during the interview stay consistent.
Best of luck on your application!